簡化除霧器墊安裝的安裝指南

除霧器墊是一種用於從氣體或蒸氣流中去除夾帶的霧的裝置,旨在在蒸餾,氣體吸收和汽提冷凝,氣體壓縮,除濕和乾燥以及去除過程中提供出色的氣液分離性能噴霧和脫鹽。 正確和適當的安裝是實現這種性能的方式。 在本文中,我們想介紹一些有用的建議,以幫助您簡化安裝步驟並獲得最佳安裝效果。

準備工作

通常,除霧器墊被製造成稍微過大,以適應容器的任何變形,並確保除霧器墊和容器壁之間的緊密配合,以防止任何氣體從接觸表面洩漏。 容器壁和除霧器墊之間的任何間隙將降低其分離效率和性能。 緊密配合確保最佳的氣液分離性能。

Step 1

第1步新除霧器墊檢查

  1. 收到除霧器墊後檢查貨物,檢查是否收到正確的除霧器墊。 檢查並測量其尺寸,以確保除霧器墊的尺寸與圖紙上的尺寸相同。 檢查是否有潛在的除霧器墊損壞。 檢查產品是否有文件。
  2. 將新的除霧器墊存放在乾燥清潔的環境中。 灰塵、沙子和其他污染物可能會污染除霧器墊。 建議長期存放倉庫。
  3. 準備安裝將所有除霧器墊部分布置在靠近容器的清潔區域。 將所有除霧器墊塊朝向正確的流向方向放置。 然後制定安裝計劃。

請記住,網墊的製造要比要安裝的容器的直徑稍大。

Step 1

步驟2拆卸現有除霧器墊

在拆除現有除霧器墊之前,強烈建議研究現有除霧器墊的安裝方式。 檢查現有除霧器墊是否有過度腐蝕或結垢的跡象,以及是否有脫落的部分。

如果現有凸台是分段構建的,請先拉動中心部分。 由於正確安裝的除霧器墊與容器壁緊密配合,因此需要更大的拉力來移除中心部分。 一旦中心部分被移除,其他部分將更容易被移除。 一次刪除一個部分。 然後將其他部分逐一拆除,以防止鬆動部分脫落。

拆除所有部分後,仔細檢查所有支撐結構是否有裂紋、過度腐蝕跡象和損壞的支撐五金件。 修理所有可能影響新除霧器墊正確安裝和操作的缺陷。 確保現有的支架適合您的新支架,注意您將使用的按住硬件。 您可以將新的墊定位或轉動到除霧器墊的確切位置,以便稍後參考。

按住選項

  • 綁紮導線

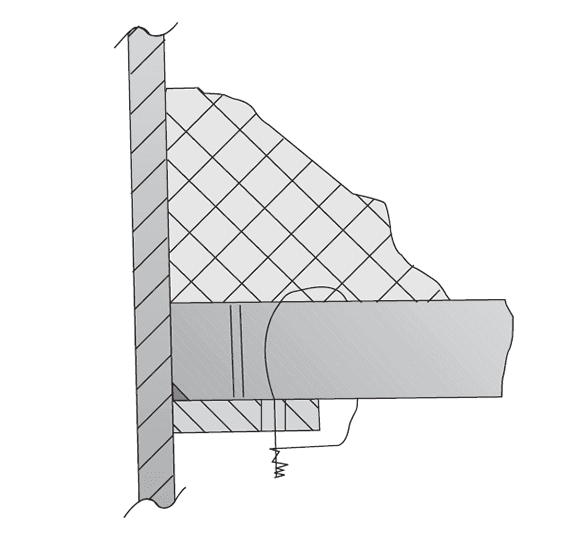
    綁紮電線是將除霧器墊連接到其支架上的最常見,最簡單的方法。 綁紮線的直徑通常為0.051英寸,並且由與網相同的材料製成。 這可以通過將綁線纏繞在底部支撐格柵和環形環孔之間並扭轉端部以將其綁在適當位置來實現。 (不要使導線穿過網格,而只是穿過支撐和網格。) 系緊每個部分中網格的四個角。 環形環孔間距通常為4 "至5",孔的直徑為1/4 "。

    The picture shows the tie wires for demister pad installation.

    除霧器墊–紮線安裝

    The picture shows the detailed drawing about tie wires for demister pad installation.

    除霧器墊–紮線安裝詳圖

    對於塑料網材料,請使用多個綁線環。

  • J型螺栓

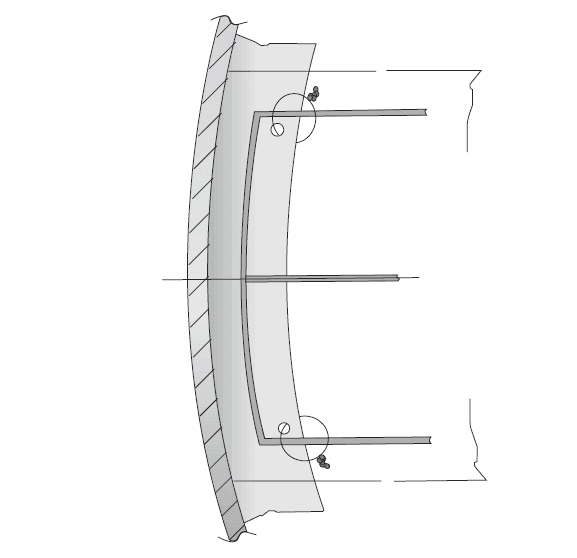
    J型螺栓可以用來代替綁線,並且更堅固。 「J」 的鉤部連接在除霧器墊的底部格柵周圍,延伸穿過環形圈中的夾具或孔,並由螺母和鎖緊螺母固定。 同樣,每個部分應使用4個螺栓。 另一種變型是 「焊接螺柱」。
    The picture shows the J-bolts for demister pad installation.

    除霧器墊– J型螺栓安裝

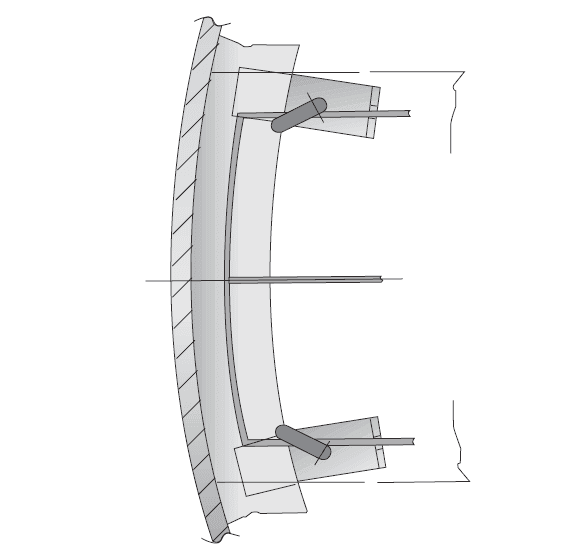
    The picture shows the detailed drawing about J-bolts for demister pads.

    除霧器墊– J型螺栓安裝詳圖

    請注意: 確保您的J型螺栓連接牢固,並且可以承受熱量和振動。 強烈建議使用雙螺母或防鬆螺母。

  • 閂鎖鍵

    當必須從停止工作時,可以使用閂鎖鍵來固定除霧器墊,並且無法進入底部。 只需將旗子轉向容器壁並擰緊雙鎖緊螺母。
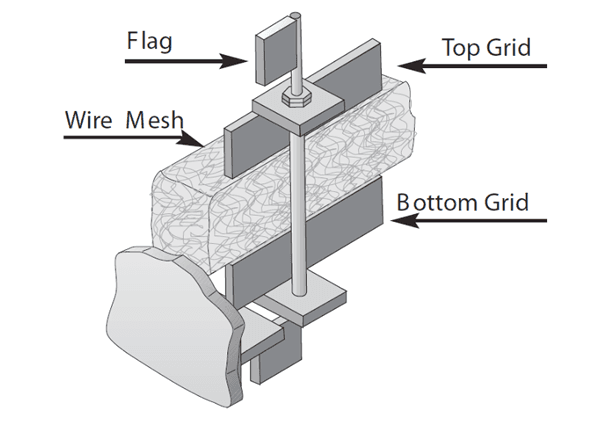
    The picture shows the latch keys for demister pad installation.

    除霧器墊–鎖鍵安裝

  • 雙支撐環

    雙支撐環在人行通道側具有可移除的環部分。 安裝最後一個除霧器墊段時,將環段用螺栓固定到位。 雙支撐環對於頂部安裝更常見,但也用於底部安裝。 雙支撐環也有助於防止壁旁路。
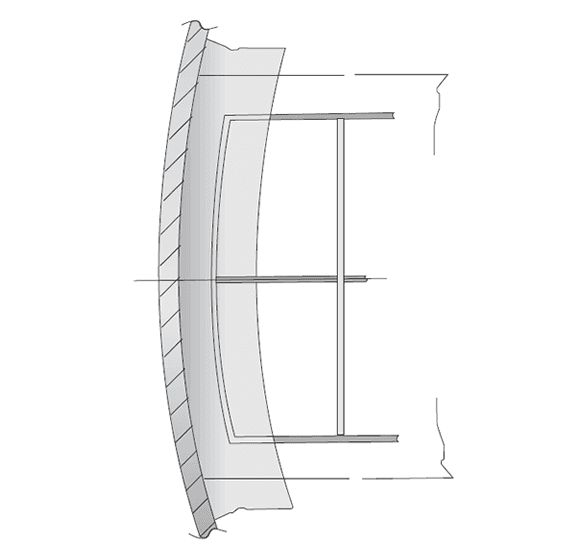
    The picture shows the dual support rings for demister pad installation.

    除霧器墊–雙支撐環安裝

    The picture shows the detailed drawing about dual support rings for demister pad installation.

    除霧器墊–雙支撐環安裝細節

    The picture shows the removable section of support rings for demister pad installation.

    除霧器墊–雙支撐環可拆卸部分安裝

  • 偏移環

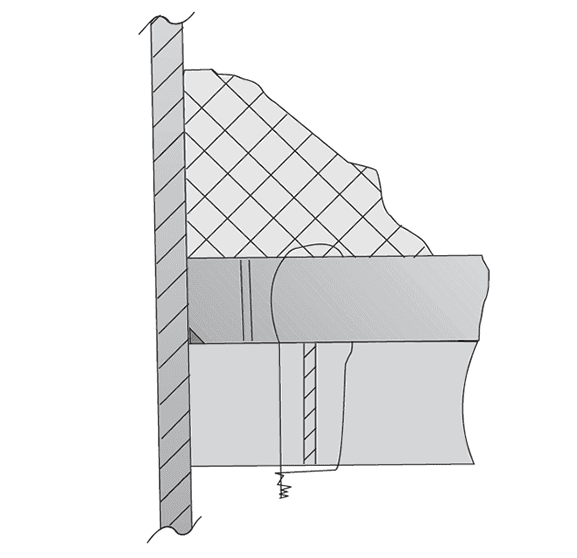
    偏移環通過支架保持遠離容器壁。 使用綁線或J形螺栓和卡箍固定除霧器墊。
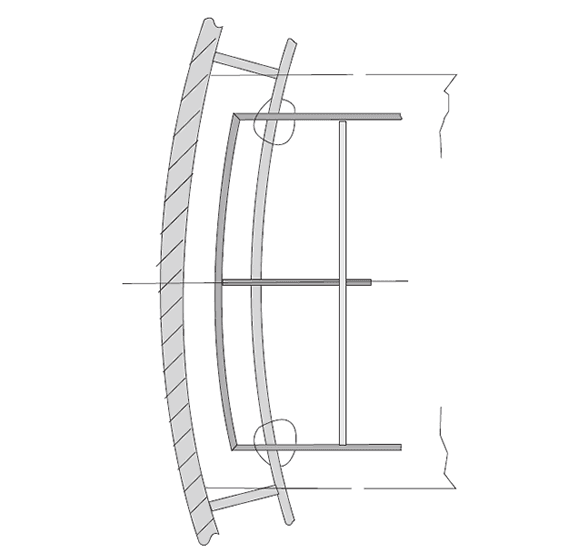
    The picture shows the tie wire with offset rings for demister pad installation.

    帶偏移環安裝的除霧器墊–紮線

    The picture shows the detailed drawing about tie wire with offsets for demister pad installation.

    帶偏移環的除霧器墊–紮線安裝詳圖

  • 按住桿

    壓桿安裝後 螺栓固定在除霧器墊上方位置,是保持除霧器墊塊完好的有效手段。
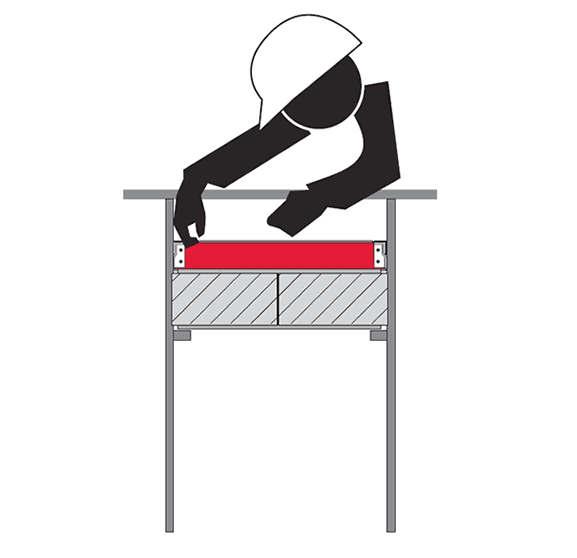
    The picture shows the hold down bar for demister pad installation.

    除霧器墊–壓桿安裝

  • 籃筐籠

    為一體式除霧器墊 的籃籠由容器頂部法蘭固定到位。 安裝一體式除霧器墊時,您只需將籠子滑到除霧器墊的頂部,並固定頭部或頂部法蘭。
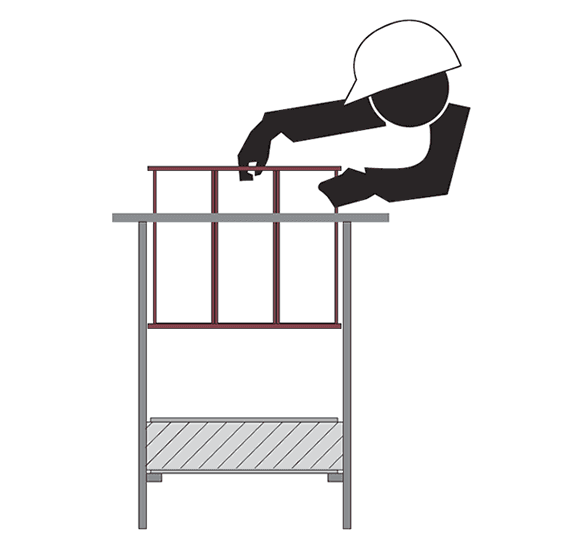
    The picture shows the basket cage for demister pad installation.

    除霧器墊–籃式籠安裝

  • 膨脹環

    當焊接到殼體上有問題時,膨脹環可用於支撐環或壓緊環。

    The picture shows the expansion ring for demister pad installation.

    除霧器墊–膨脹環安裝

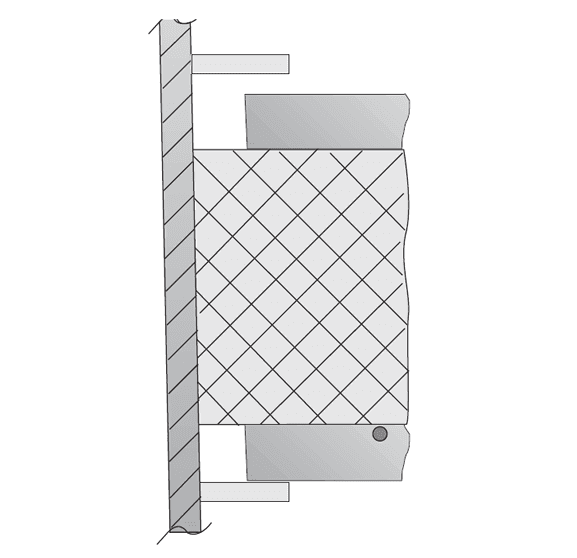
    對於安裝在帶有法蘭頂部的小直徑容器中的除霧器墊,該墊必須分成兩部分,以清除焊接在殼體上的壓緊桿夾。
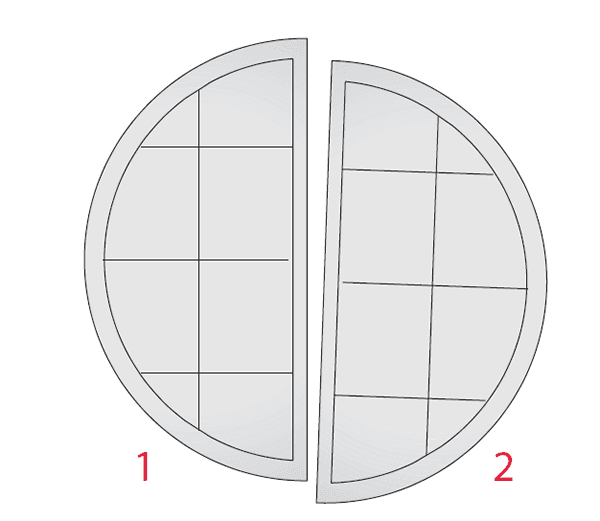
    The picture shows the demister pad installed in small vessels is divided into two sections.

    小型容器中的除霧器墊分為兩部分,以清除焊接在外殼上的壓緊桿夾。

    出口在除霧器墊上方壓住法

    如果安裝人員必須離開除霧器墊上方的人孔,則從下方安裝除霧器墊綁紮接線,從外部向中心工作。 從頂部安裝最後一個節段,並通過在最後一個節段上放置3根壓桿 (1/4 "x 1" 扁棒) 將其固定到相鄰節段,並將接線或J型螺栓連接到相鄰節段。

    The picture shows the diagram of manway section and hold down bars for demister pad installation.

    用於除霧器墊安裝的人道部分和壓桿

Step 1

步驟3安裝

  • 一體式除霧器墊

    除J形螺栓外的任何緊固方法均可用於單件除霧器墊。 對於新容器,在將除霧器墊推入容器之前,確保容器壁光滑且無焊接飛濺物和其他碎屑。 請記住,網格直徑應稍微超過血管直徑,以確保如右圖所示的緊密配合。

    The picture shows the installation method of the one piece demister pad.

    一體式除霧器墊安裝方法:

  • 安裝多節除霧器墊在垂直容器
    • 容器單支撐環
      1. 在安裝任何部分之前,在支撐環上標記指示每個部分邊緣應位於何處的線。 安裝每個節時,根據您的標記對齊節。
      2. 通過將末端部分放置在支撐環的頂部,從每一側的外部進行操作。
      3. 將安裝的部分壓縮到您的測量值,並保持相對的部分平行。
      4. 在每個部分正確就位後,使用按住固定。
      5. 在添加截面時向中心移動,直到只剩下一個截面。 使用金屬板或紙板,以便於安裝。
      6. 如果要從下方安裝,請將整個最後一部分通過相對的襯墊部分之間的空隙空間提起,小心放置,然後將其向下拉入到位。
      7. 如果要從上方安裝,請在仔細對齊後將該部分推入到位。
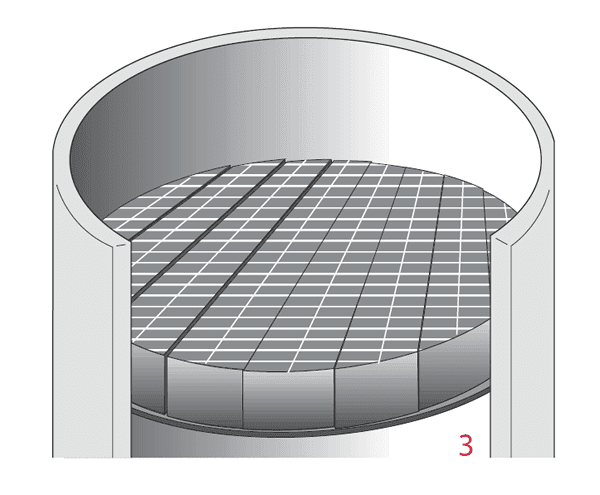
      Three sections of the demister pad are installed on the single support ring.

      帶單支撐環的多節除霧器墊安裝步驟1

      Five sections of the demister pad are installed on the single support ring.

      帶單支撐環的多節除霧器墊安裝步驟2

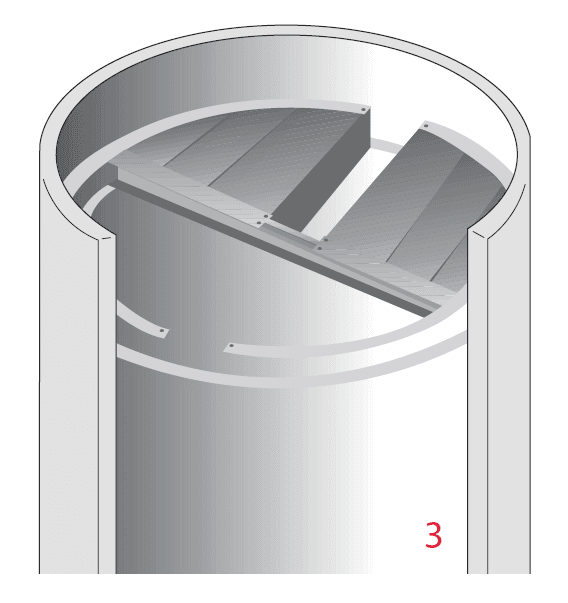
      All sections of the demister pad are perfectly installed on the single support ring.

      帶單支撐環的多節除霧器墊安裝步驟3

    • 容器與雙支撐環
      1. 在支撐網格上標記指示網格截面應位於何處的線。 當您從容器壁向內工作時,根據您的標記對齊截面,一次在容器的一側。
      2. 壓縮已安裝的部分以適合您的測量,並保持相對的部分平行。 繼續操作時,在環上使用c形夾或等效物將各部分固定到位。
      3. 要安裝截面,請使用兩塊薄金屬片或一些光滑但堅固的材料來製作簡單的安裝輔助工具,這些材料會延長截面的長度並比截面高。
        您甚至可能希望在輔助工具中切割手柄。 將安裝輔助工具放置在網格的任一側,以減少網格表面的摩擦。 壓縮是必要的,因此當您將部分推入到位時,請期待阻力。 將截面推入並拉出輔助設備。
      4. 更換支撐環和橫樑上的可拆卸部分。
    A section of the demister pad is installed between the center support beam and dual support rings.

    帶雙支撐環的多節除霧器墊安裝步驟1

    Two sections of the demister pad are installed between the center support beam and dual support rings.

    帶雙支撐環的多節除霧器墊安裝步驟2

    Six sections of the demister pad are installed between the center support beam and dual support rings.

    帶雙支撐環的多節除霧器墊安裝步驟3

    Seven sections of the demister pad are installed between the center support beam and dual support rings.

    帶雙支撐環的多節除霧器墊安裝步驟4

    Half of the demister pad sections are perfectly installed firmly in the vessel.

    帶雙支撐環的多節除霧器墊安裝步驟5

    The first section of the other half of the demister pad is installed between the center support beam and dual support rings.

    帶雙支撐環的多節除霧器墊安裝步驟6

    Six sections of the other half of the demister pad is installed between the center support beam and dual support rings.

    帶雙支撐環的多節除霧器墊安裝步驟7

    All sections of the demister pad are perfectly installed in the vessel.

    帶雙支撐環的多段除霧器墊安裝步驟8

  • 安裝多節除霧器墊在臥式容器
    • 臥式容器,帶垂直除霧器墊
      1. 標記支撐環和梁,指示網格的每個壓縮部分應放置的位置。
      2. 從血管壁向中心工作,將每個壓縮部分與支撐環和梁標記對齊。
      3. 要安裝最終部分,請使用兩塊薄金屬片或一些光滑但堅固的材料來擴展部分的長度,從而進行簡單的安裝輔助。 您甚至可能希望在輔助工具中切割手柄。 將安裝輔助工具放置在網格的任一側,以減少網格表面的摩擦。 壓縮配合是必要的,因此當您將最後一部分推入到位時,請期待阻力。 將截面推入並拉出輔助設備。
      4. 更換支撐環和橫樑上的可拆卸部分。
      The picture shows the installation procedures of the vertical demister pad in horizontal vessels.

      臥式容器垂直除霧器墊安裝程序

      The picture shows the top view of the demister pad final section installation diagram.

      除霧器末段安裝俯視圖

    • 臥式容器,帶臥式除霧器墊
      1. 標記支撐以指示每個部分的位置。
      2. 從兩端開始,確保每個部分都正確對齊,壓縮並牢固地綁住。 向可移動部分移動,將部分添加到兩側,直到保留最後一個部分。
      3. 要安裝最終部分,請使用兩塊薄金屬片或一些光滑但堅固的材料來擴展部分的長度,從而進行簡單的安裝輔助。 將安裝輔助工具放置在網格的任一側,以減少網格表面的摩擦。 壓縮配合是必要的,因此當您將最後一部分推入到位時,請期待阻力。 將截面推入並拉出輔助設備。
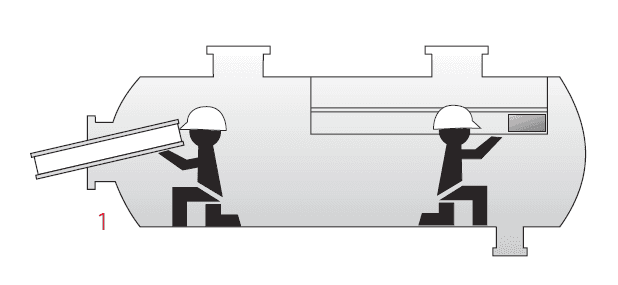
      One worker carries one section of the horizontal demister pad and the other work installs another section into the right side of the horizontal vessel.

      臥式容器中的臥式除霧器墊安裝步驟1

      A worker installs three sections of the horizontal demister pad into the right side of the horizontal vessel.

      臥式容器中的臥式除霧器墊安裝步驟2

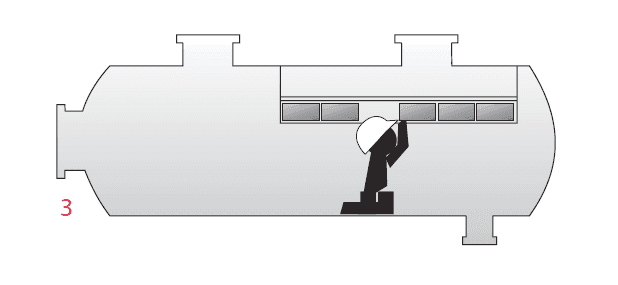
      A worker installs three sections of the horizontal demister pad into the right side and two sections of the horizontal demister pad into the left side of the horizontal vessel.

      臥式容器中的臥式除霧器墊安裝步驟3

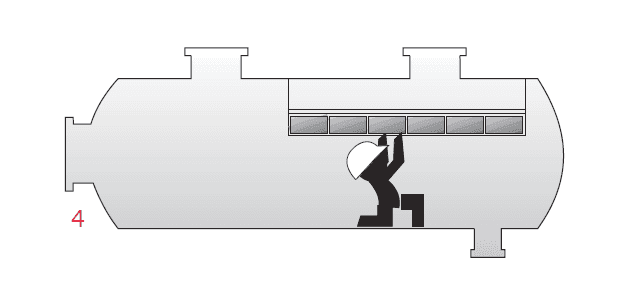
      A worker installs all sections of the horizontal demister pad into the horizontal vessel.

      臥式容器中的臥式除霧器墊安裝步驟4

最後說明:

確保並檢查所有安裝程序完成後的工作。

  1. 檢查截面之間是否存在任何間隙。 整個除霧器墊的均勻壓縮配合是重要的。
  2. 檢查以確保您的束縛是安全的,並且彼此之間是均勻的。 確保環和橫樑充分支撐除霧器墊。
  3. 如果您的除霧器墊是雙密度設計,請確保所有部分都以正確的流動方向安裝。
  4. 確保在啟動前移除所有工具和安裝材料。
A packed tower and we can see the column internals, demister pads and random/structured packing clearly.